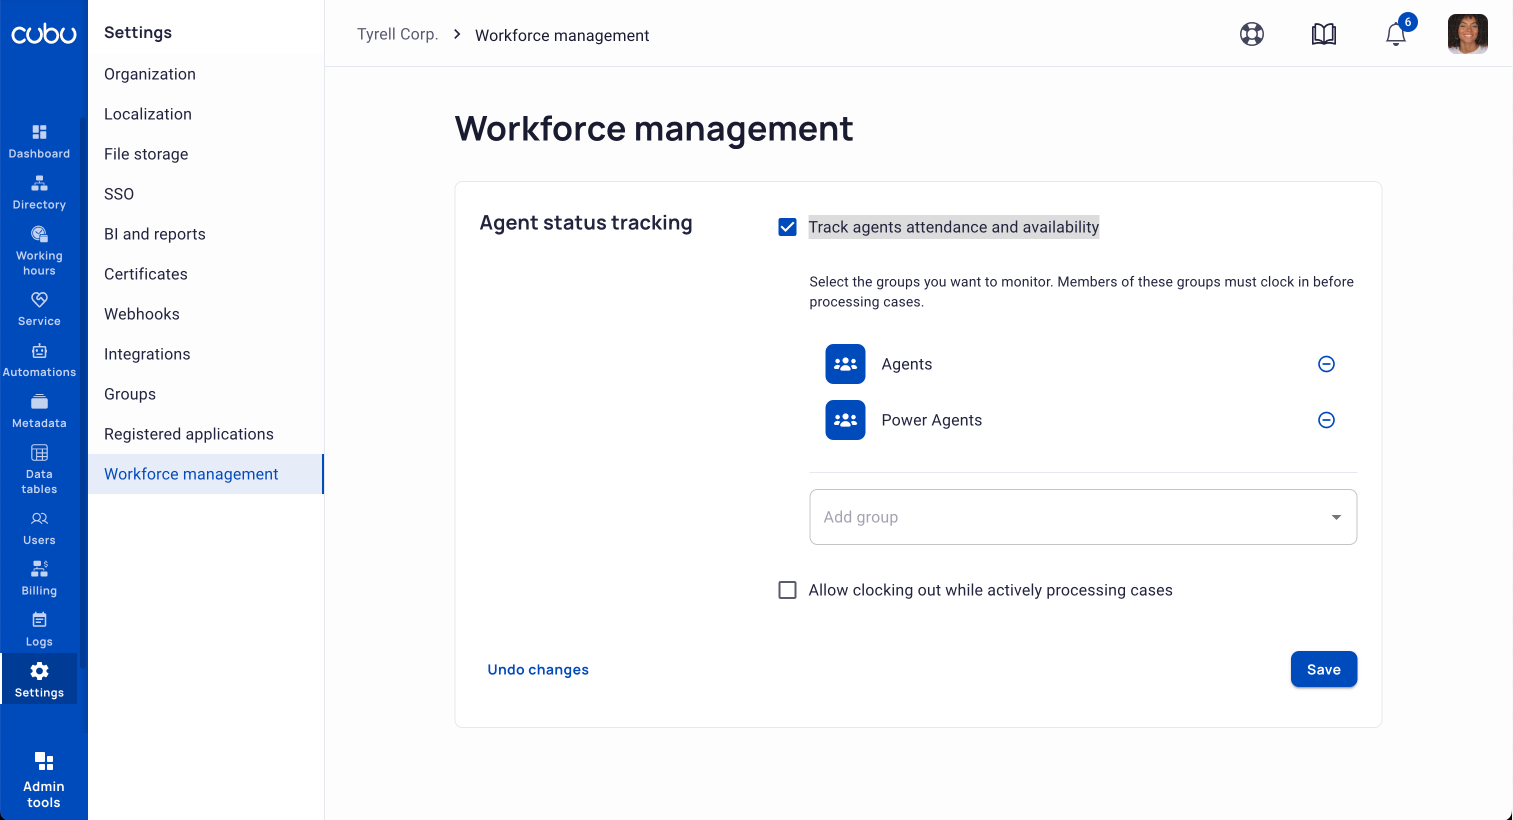
The Workforce Management Page
The Workforce Management Page
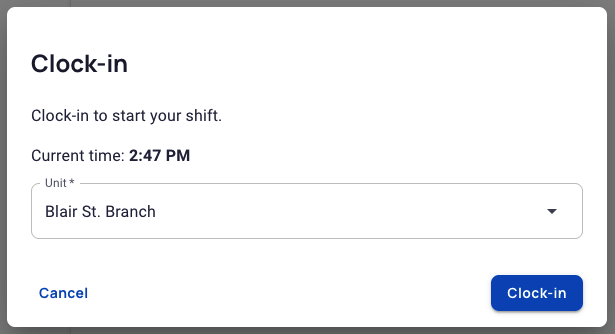
The Clock-in Dialog
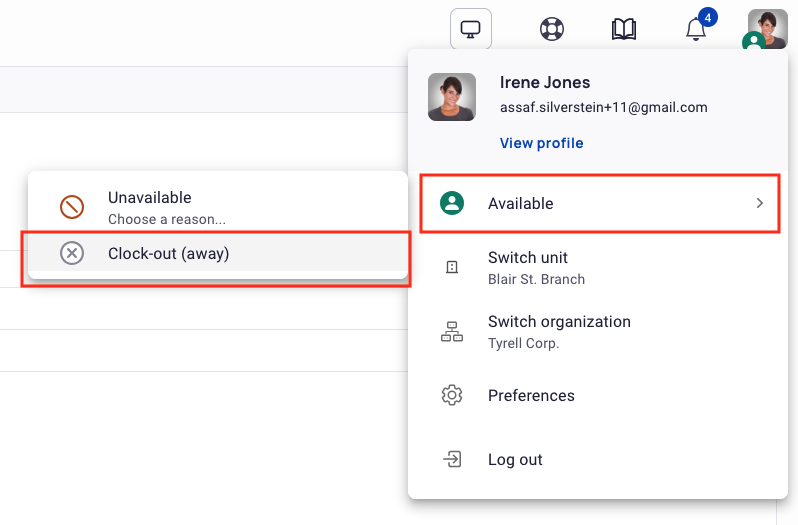
Clock-out Menu Option
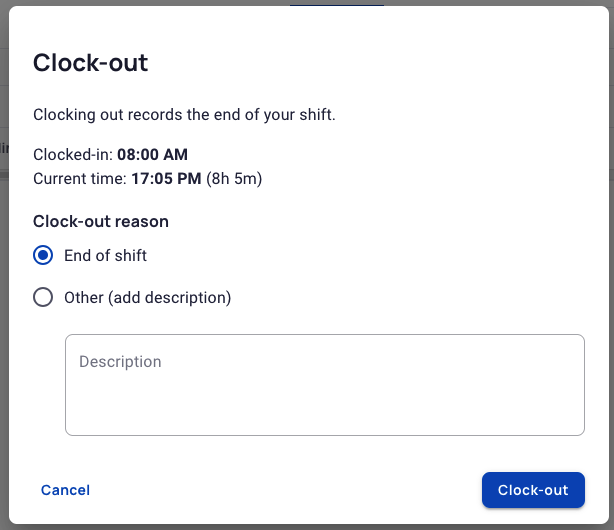
The Clock-out Dialog
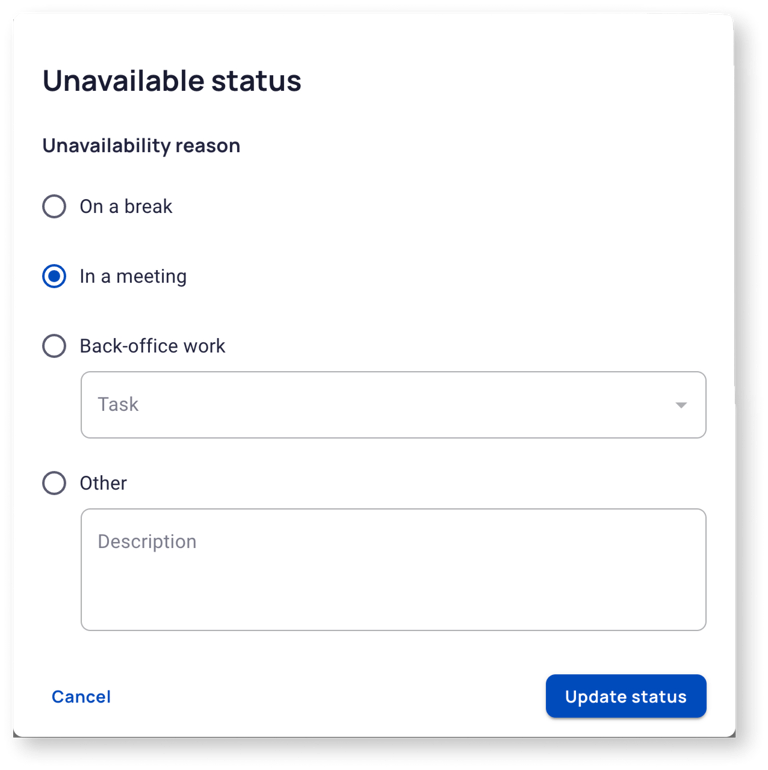
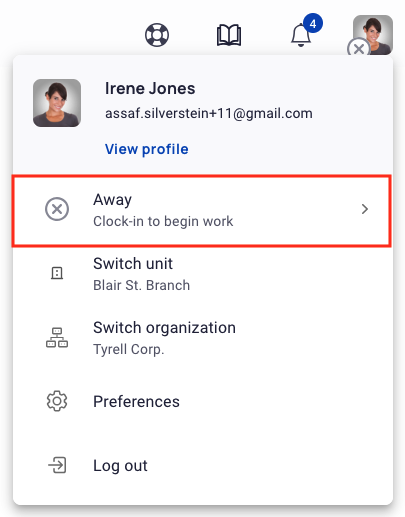
The Unavailable Status Dialog
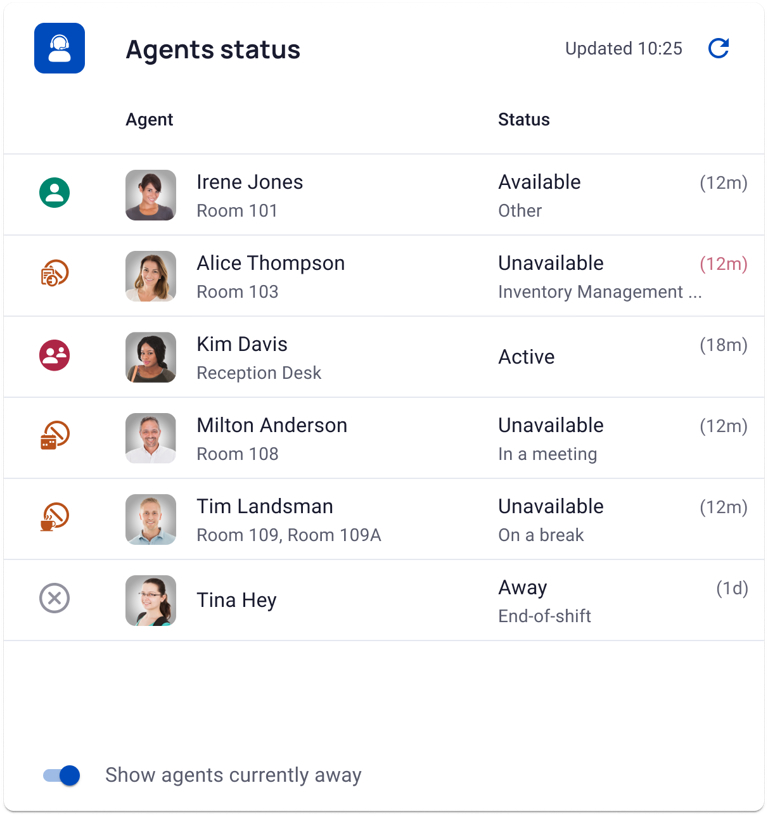
The Agents Status Dashboard Widget
 ) and make sure it is selected.
{% endhint %}
### Historical Data
To analyze agent attendance and availability of historical data in real-time, use the **Agent Attendance** report.\
This report provides a detailed analysis of **Agents' Attendance and Availability**, offering insights into how agents manage their time and availability.
For more details, see:
{% embed url="
) and make sure it is selected.
{% endhint %}
### Historical Data
To analyze agent attendance and availability of historical data in real-time, use the **Agent Attendance** report.\
This report provides a detailed analysis of **Agents' Attendance and Availability**, offering insights into how agents manage their time and availability.
For more details, see:
{% embed url="