# The Inbox Tab
The Inbox tab displays cases in the inbox and enables actions on them.
## Inbox Actions
### Creating a New Case
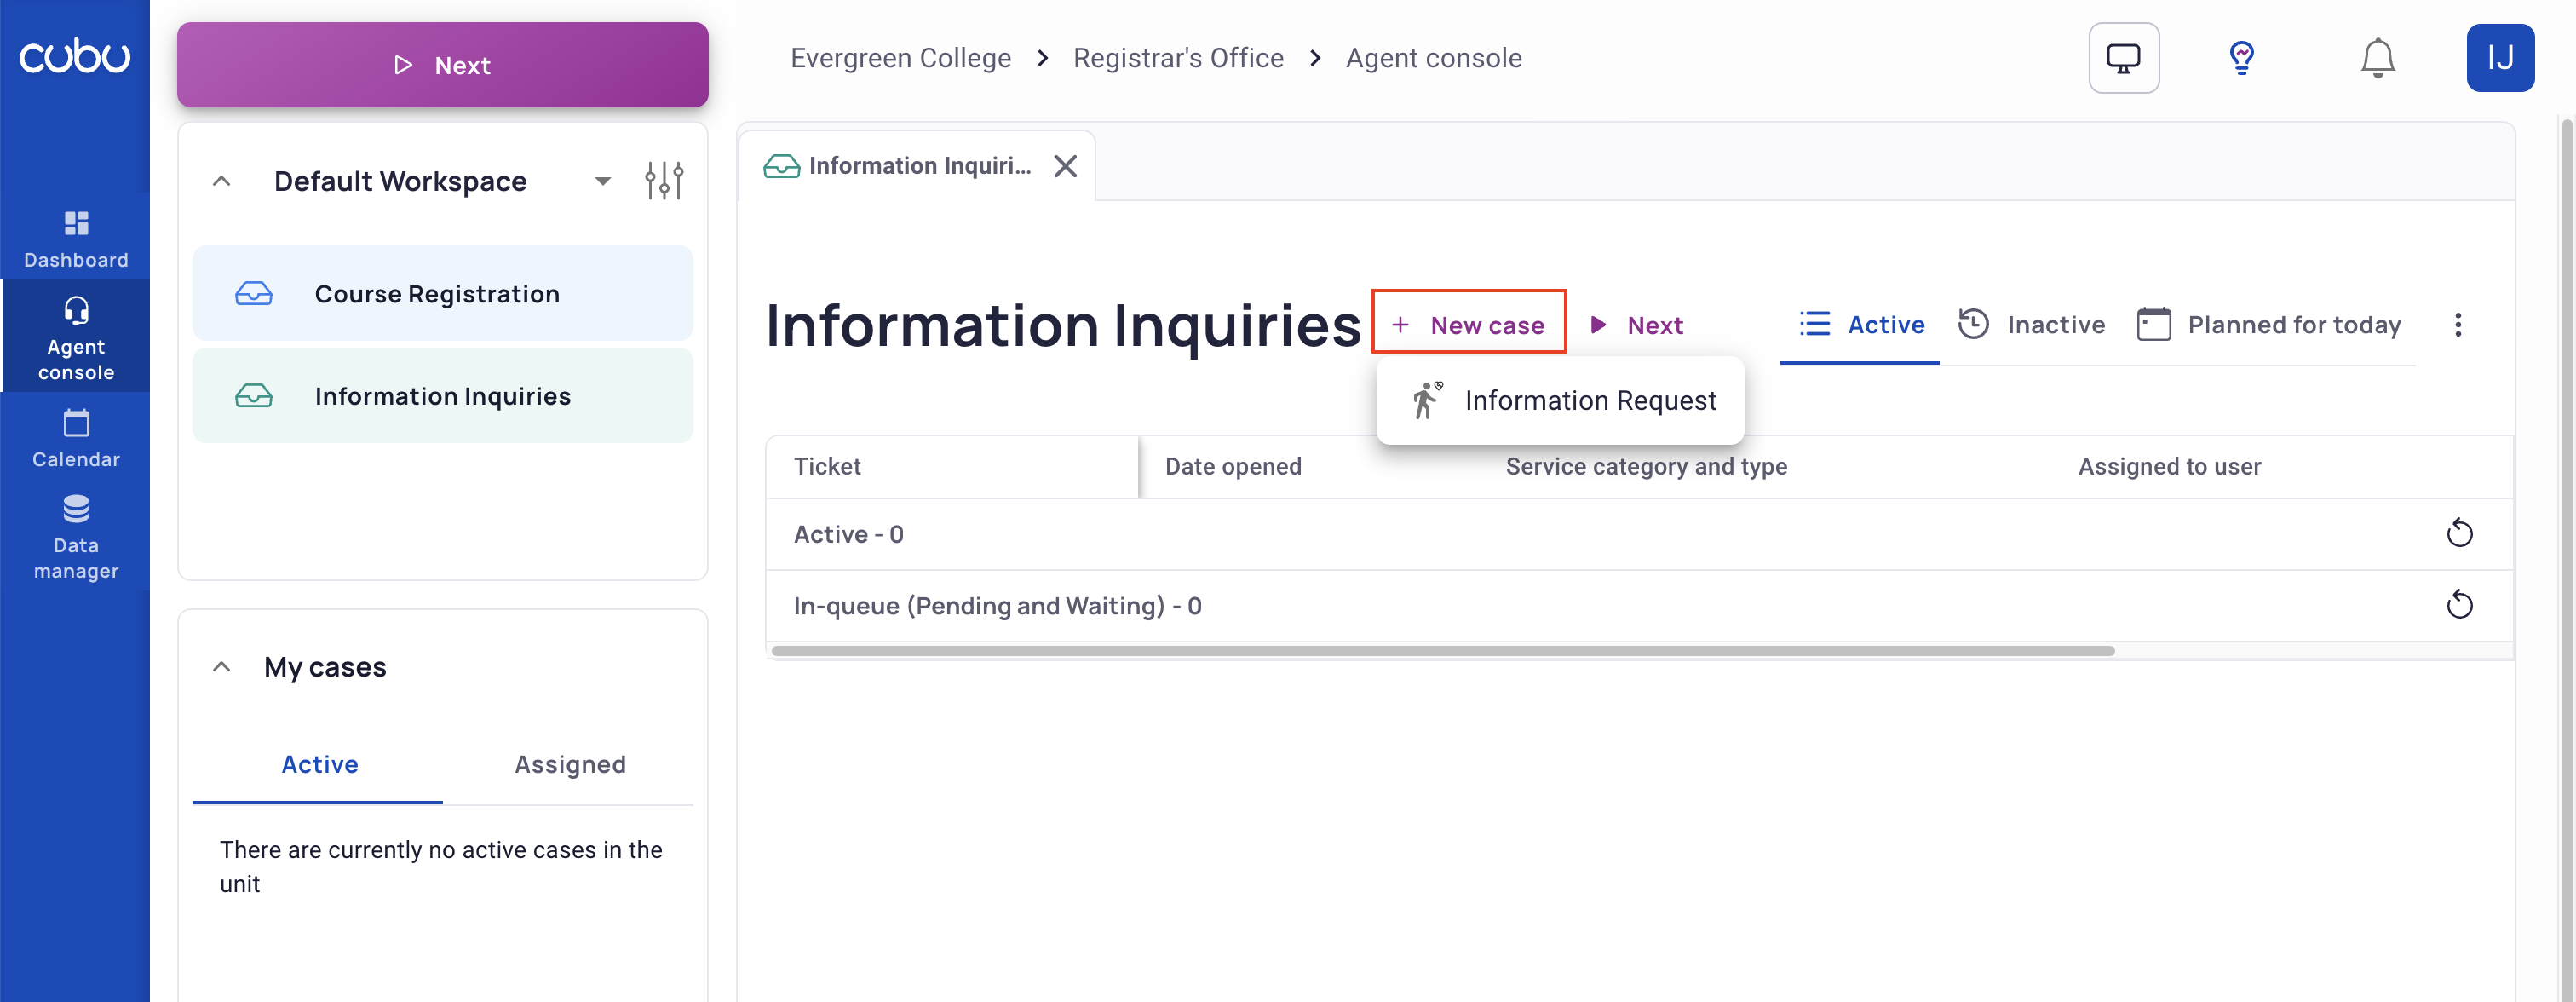
Agents can create new cases for walk-in services directly inside an inbox.
To create a case, click on the **New Case** button in the inbox where you wish to create the case. A drop-down menu will open to show the available services.
{% hint style="info" %}
Check the "Enable manual creation of cases" option on the service for it to show in the list.
{% endhint %}
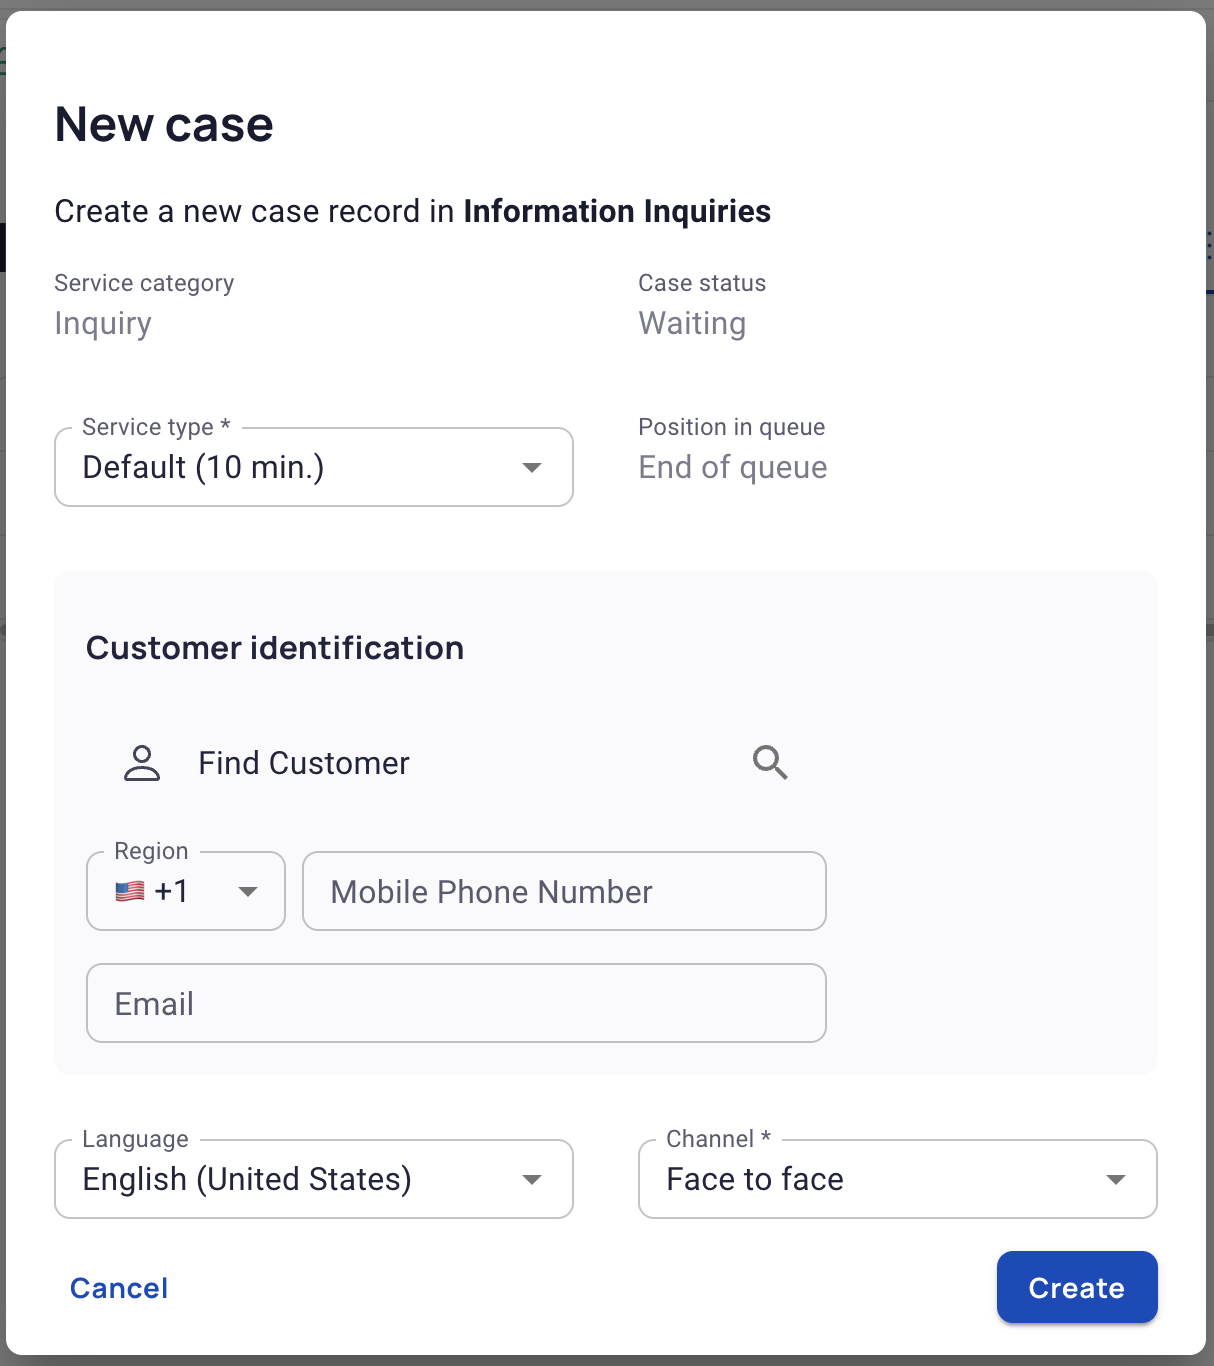
Click on the desired service to open the New Case dialog box.
Using the dialog, you can:
* Select a service type for the new case.
* Link a customer record to the case.
* Enter a contact phone number and email to send messages to the customer.
* Choose the communication language. The communication language determines the language of emails and SMS messages sent to the customer.
* Choose the communication channel (face-to-face, video, or phone). Opting for the video channel will create online video meetings (if a provider is configured in your organization).
When a new case is created, it enters the inbox's **queue**.
### Call the Next Case
To call and start processing the following case in line, click "Next".
Inbox Next Button
{% hint style="info" %}
Cases assigned to other users will be skipped when using the Next button.
{% endhint %}
## Columns
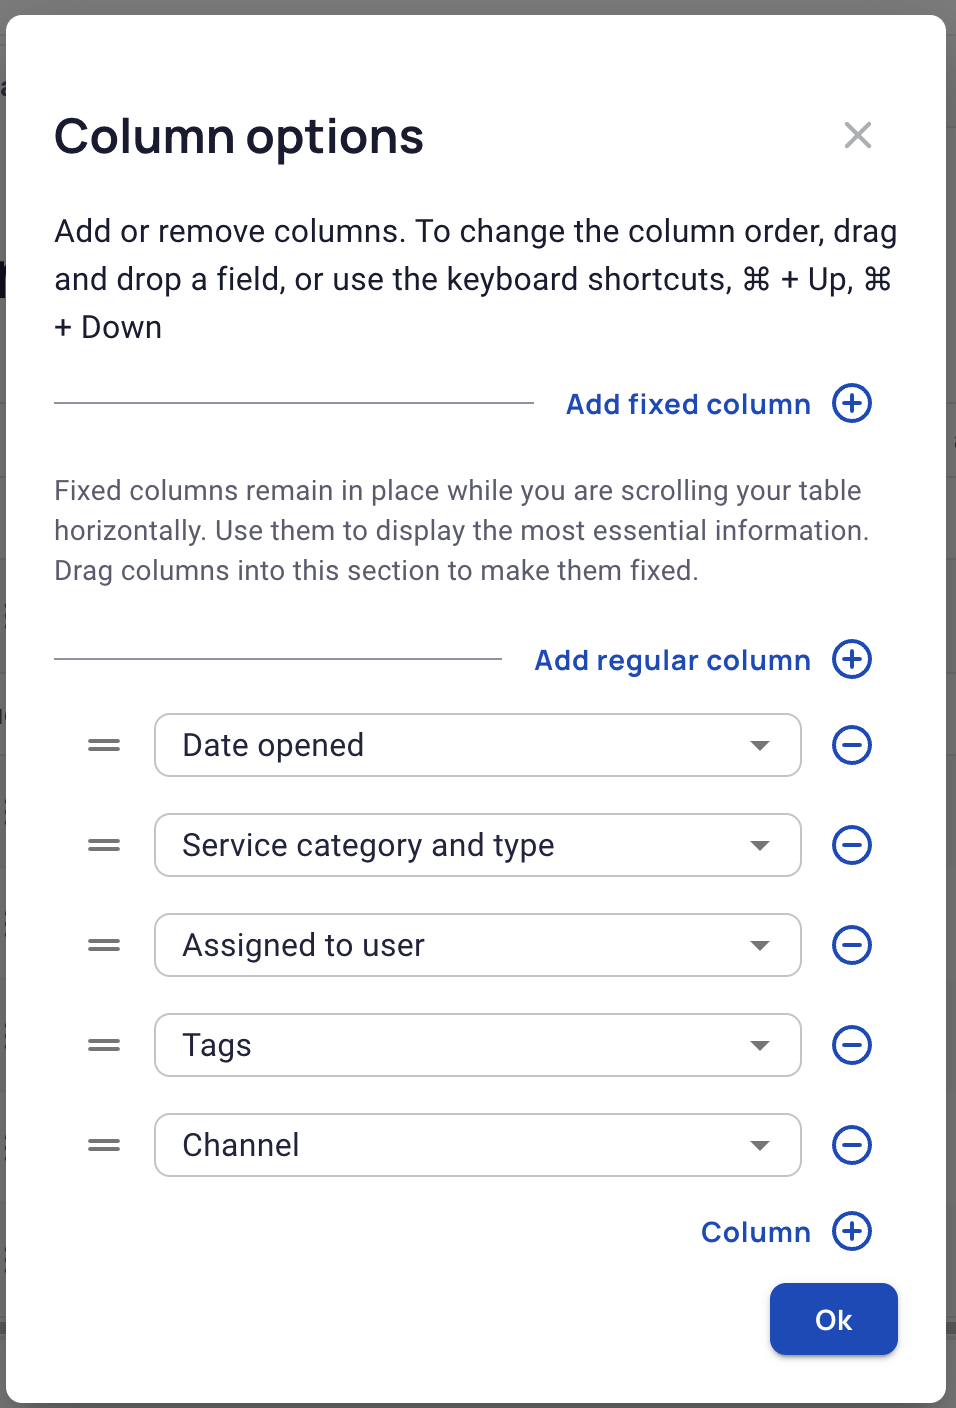
Click the \[⋮] button to open the inbox menu to add or remove columns to the case list. Click Column Options to show the Column Options dialog.
The dialog lets you choose columns from predefined columns and fields. Use the drag handles to change the column order. Drag columns to the Fixed Columns area to "freeze" the columns and prevent them from scrolling out of view when using the horizontal scroll bar.
Column Options Dialog
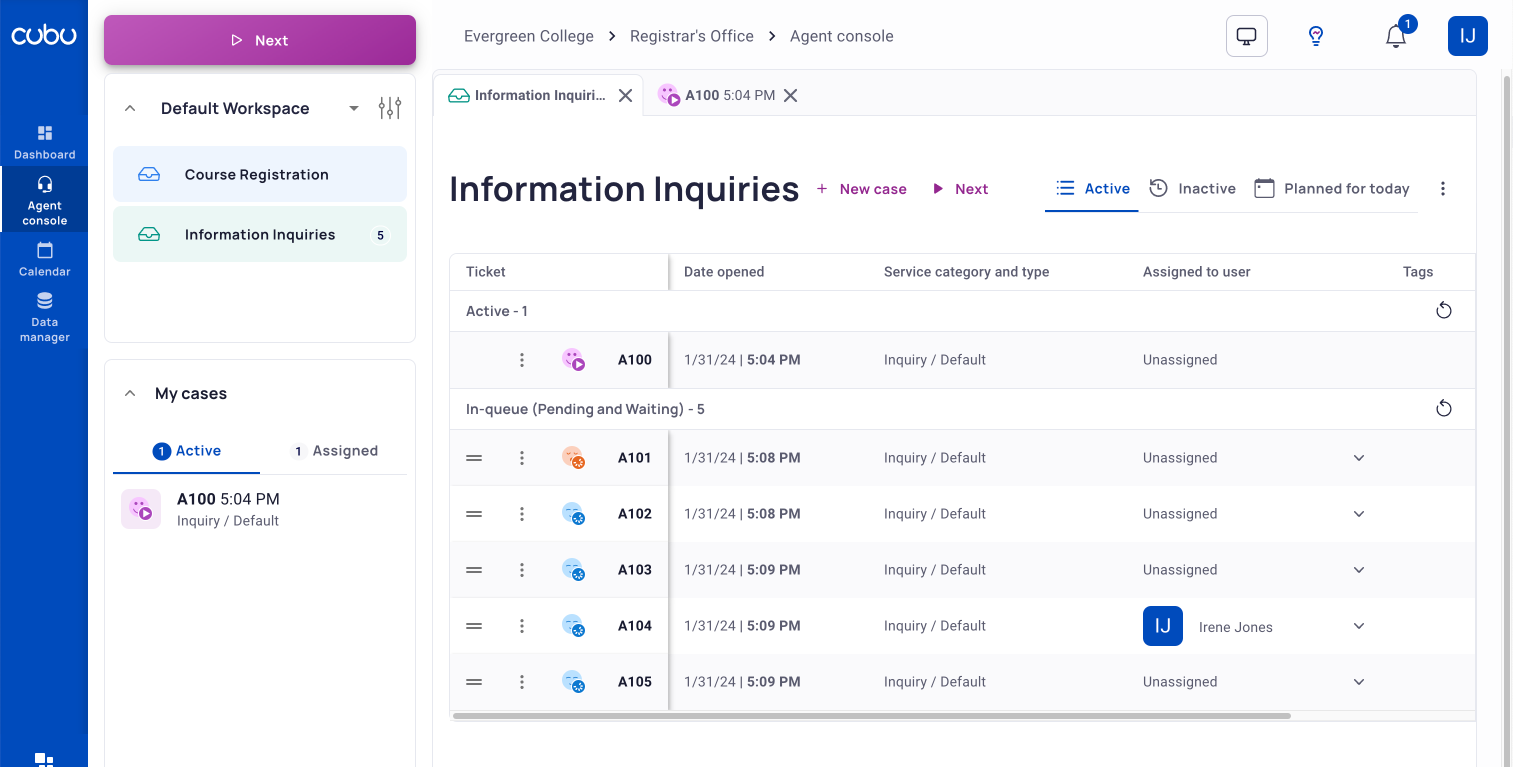
## Inbox Active View
This view displays Active cases (currently served by agents) and cases in the queue, either in Waiting or Pending status. For more information on case statuses, refer to: [introduction-to-cases](https://docs.cubu.com/guides/understanding-the-basics/process-management/introduction-to-cases "mention").
Inbox Active View
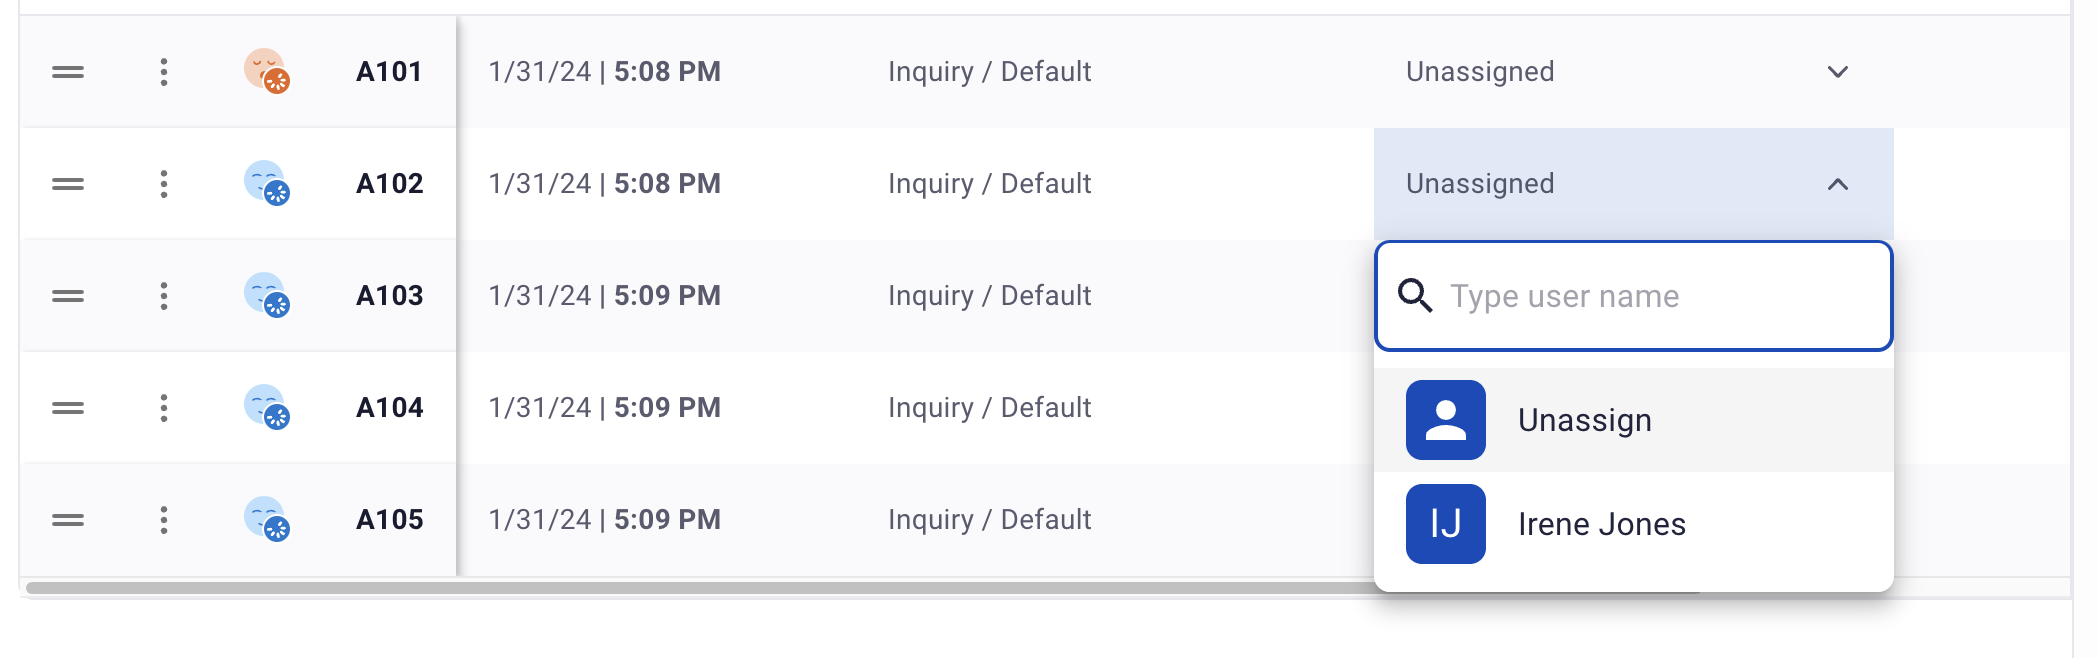
### Assign a Case to a User
Inboxes are often accessed by a team of users who work together to resolve cases in the inbox. This working model generally leads to better performance as the first available agent calls the next case in line. \
\
However, in some cases, it is recommended to assign cases to specific users is recommended. This is particularly important if processing the case or serving the customer requires a specific skill, such as if the customer speaks a foreign language or resolving the issue requires specialized knowledge.\
\
Assigning a case to a user ensures that only this user can process it. If a case assigned to a user is at the top of the queue, and **another** user clicks "Next," the assigned case will be skipped. The case will called only when the assigned user clicks "Next."\
\
Agents can assign cases themselves, while Power Agents can assign cases to other users.
To assign a case to a user, choose a user from the Assigned to User dropdown:
Assign Case to User Dropdown
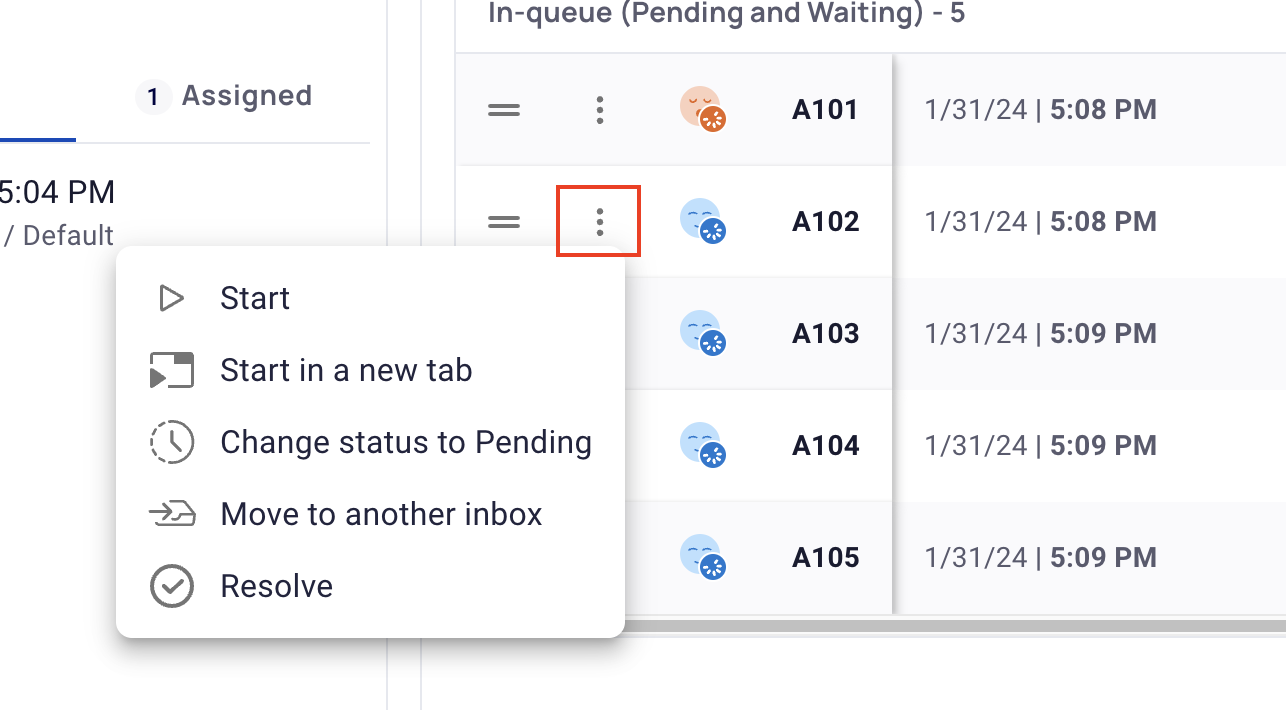
### Case Actions
To perform actions on specific cases, click the \[⋮] button next to the case. This will open a context menu. The options in the menu may vary depending on the case status and your permissions.
Case Context Menu
#### Start
Start processing (serving) the selected case. The case status will become active and be opened in a tab in the console.
Other active cases may be resolved depending on the workspace's "Next" behavior. For more information, refer to: [workspace-settings-tab](https://docs.cubu.com/guides/user-tools/agent-console/workspace-settings-tab "mention").
#### Start in a New Tab
Start processing (serving) the selected case. The case status will become active and be opened in a tab in the console. The case is always opened in a new tab. Other active cases do not change.
#### Change Status to Pending / Change Status to Waiting
Changes a waiting case to pending and vice versa.
{% hint style="info" %}
A **Pending** case is waiting for something before it can be called. It keeps its place in the queue but may be skipped if agents move on to the next case without the required action.
{% endhint %}
#### Resolve
Immediately resolves the case.
#### Move to Another Inbox
Opens the Move Case dialog, allowing you to select a destination inbox for the case.
#### Change Position in Queue
To change the case position in the queue, use the drag handle to drag the case to the desired position.
{% hint style="info" %}
Changing case positions requires the **Power Agent** role.
{% endhint %}
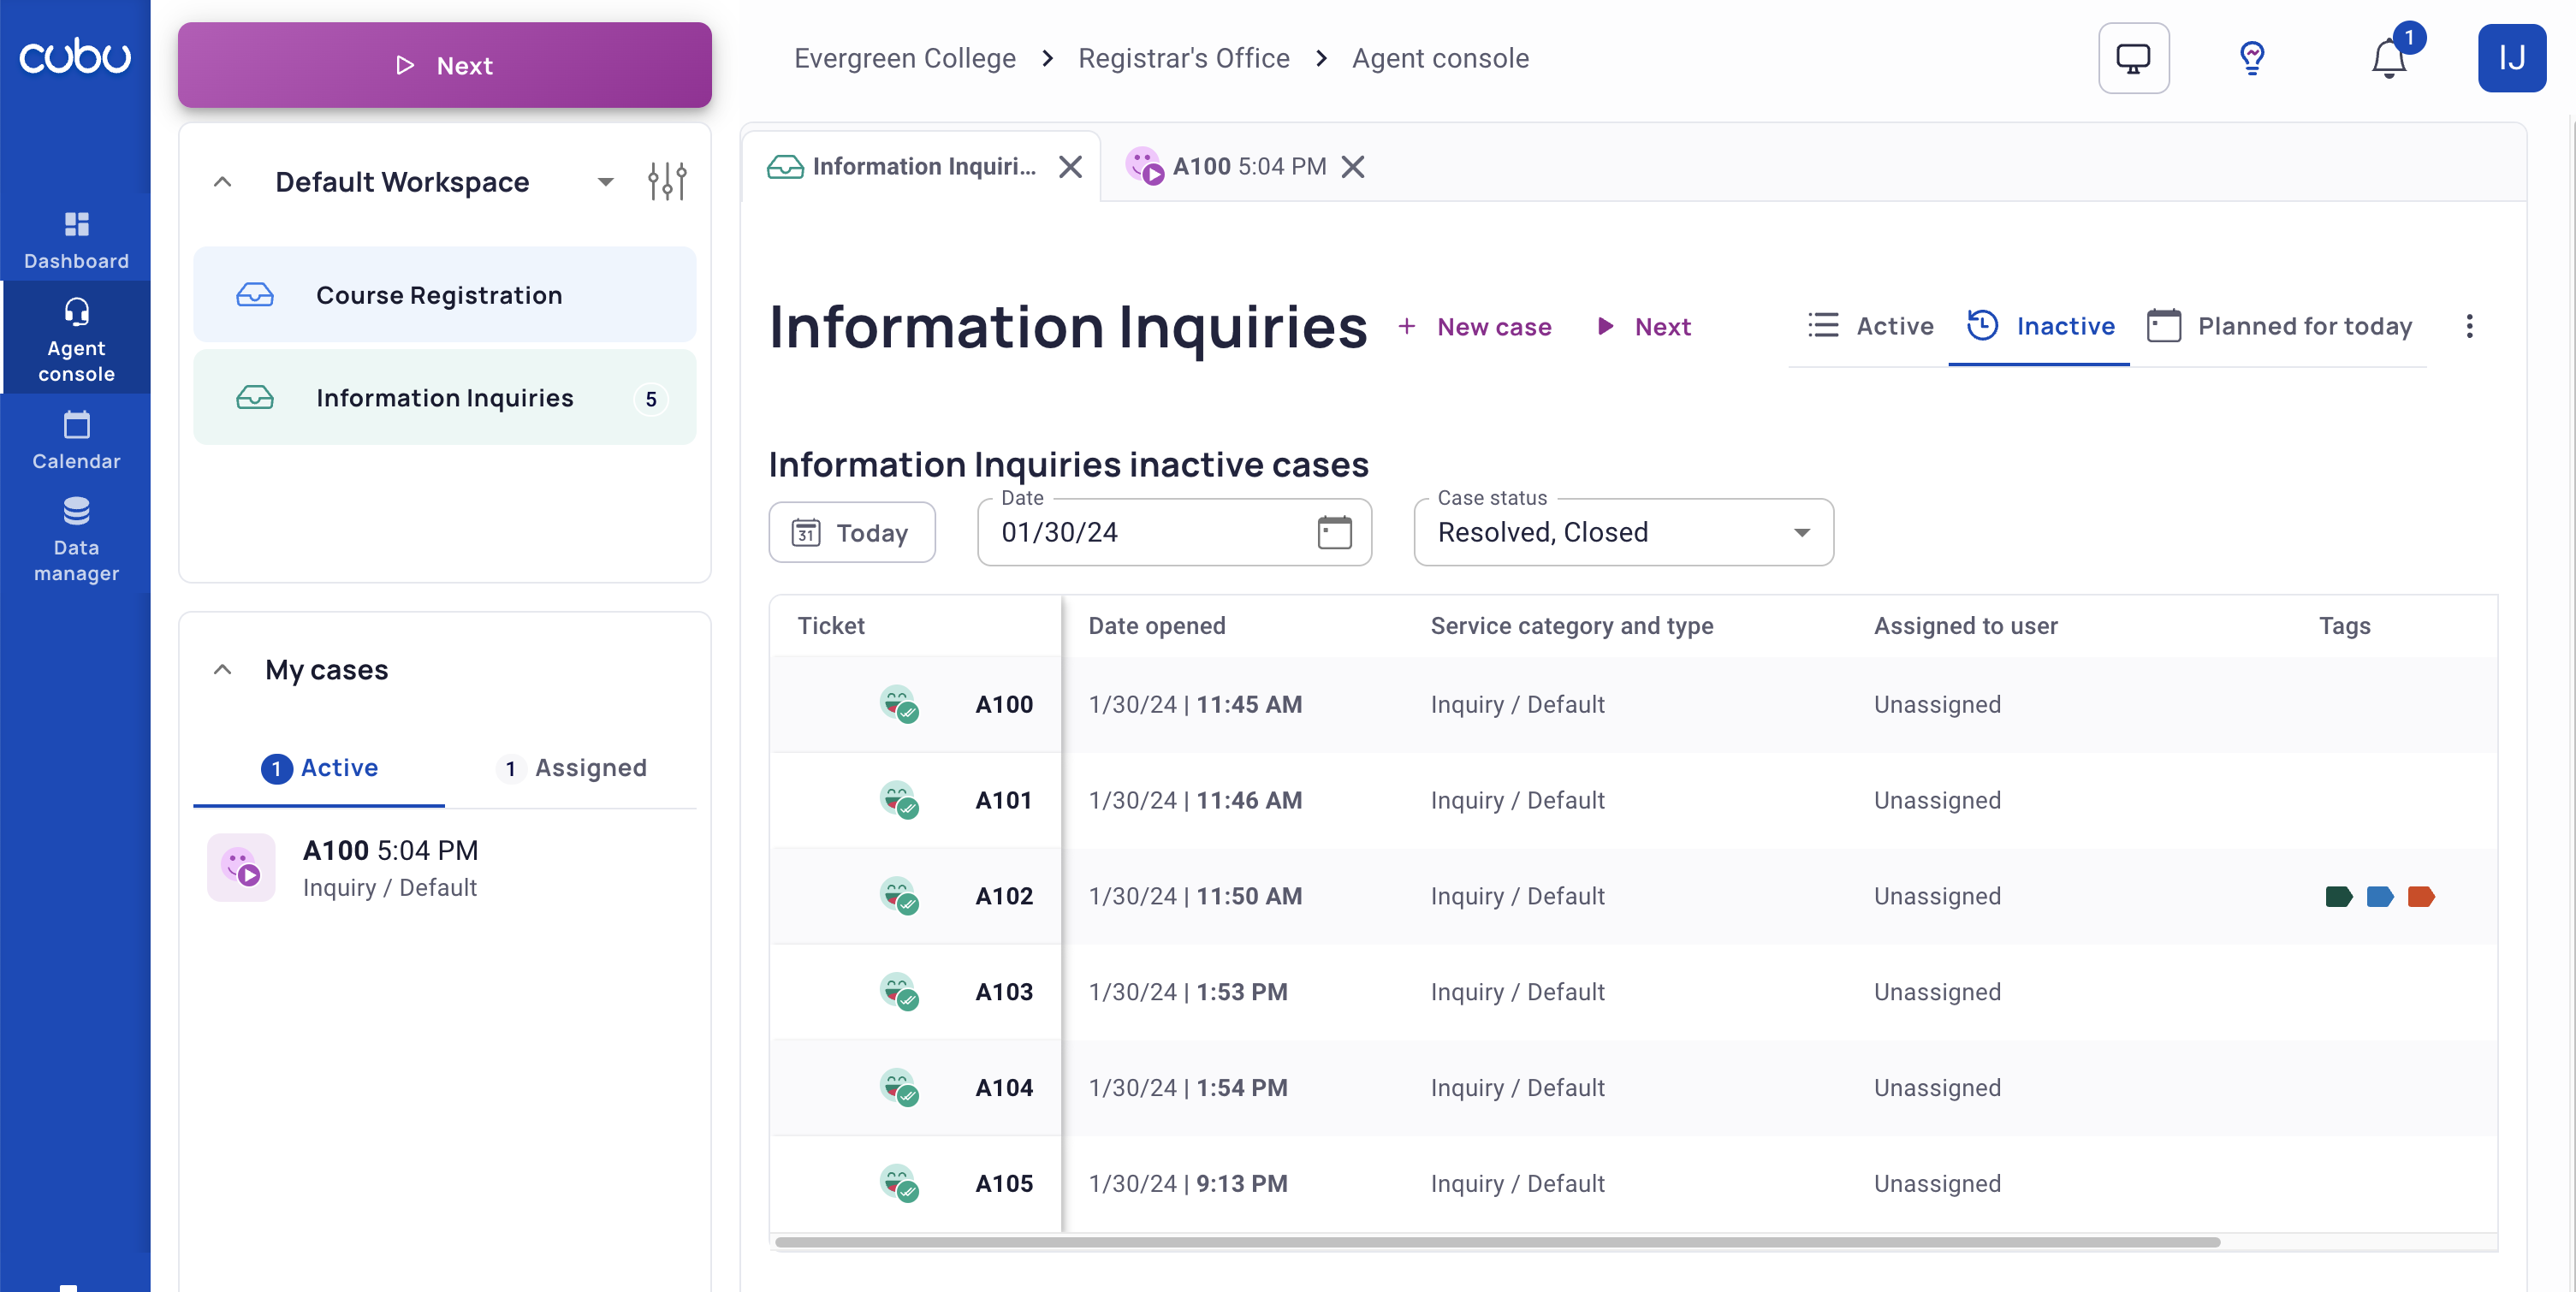
## Inbox Inactive View
This view allows you to search for Resolved, Closed, or Cancelled cases in the inbox on selected dates.
Double-click a case to open the case and view its details.
Inbox Inactive View
## Planned for Today View
This view displays upcoming appointments not checked in from calendars associated with this inbox.